
How To: Foamie Furniture (Van Life)

Welcome to my foamie furniture build tutorial.
For those not familiar, I’m a freelance photojournalist and documentary photographer based in Columbia, South Carolina. My van is set up to help me cover hurricanes, when resources like gas, power and lodging are often nonexistent.
I built my van furniture out of insulation foam because it is extremely lightweight. It doesn’t need to look like a professional factory build. My 2018 Promaster City, Van Go, is practical. On flat land (where hurricanes normally hit) I can average 34 mpg. Wood is heavy. Van Go is light.
I’ve outlined my process below in both video form and with stills and text. Pick your poison.
In 2023, I plan to add the Starlink RV satellite technology to my kit. It will save me hours in the field during the most valuable moments immediately following a storm. You can support that effort by contributing to my hurricane communication fund.
My previous experience building with insulation foam is limited to the construction of two small cat homes. I’ve read things on the internet and watched Youtube, talked with friends and jumped in. I am not an expert, but here’s some tools and supplies I used (with links when appropriate). A lot of it was trial and error and it took me about a month to finish the project. Conceivably, I can do it now in 3-4 days, depending on the weather (humidity). Unless linked, these items should be available at any Lowes or hardware store.
Kraft paper (3 rolls)
Titebond Glue II (gallon)
Bonding primer (gallon)
Matte polyurethane
Two foam board sheets (1 in. thick - 4 ft. x 8 ft.)
Assortment of brushes, paint rollers
Gorilla Glue Const. Adhesive
Wood skewers
Clamps (3)
Utility blade
Gloves
T-Squares
Yardstick
Tape measure
Permanent marker
Pruning shears
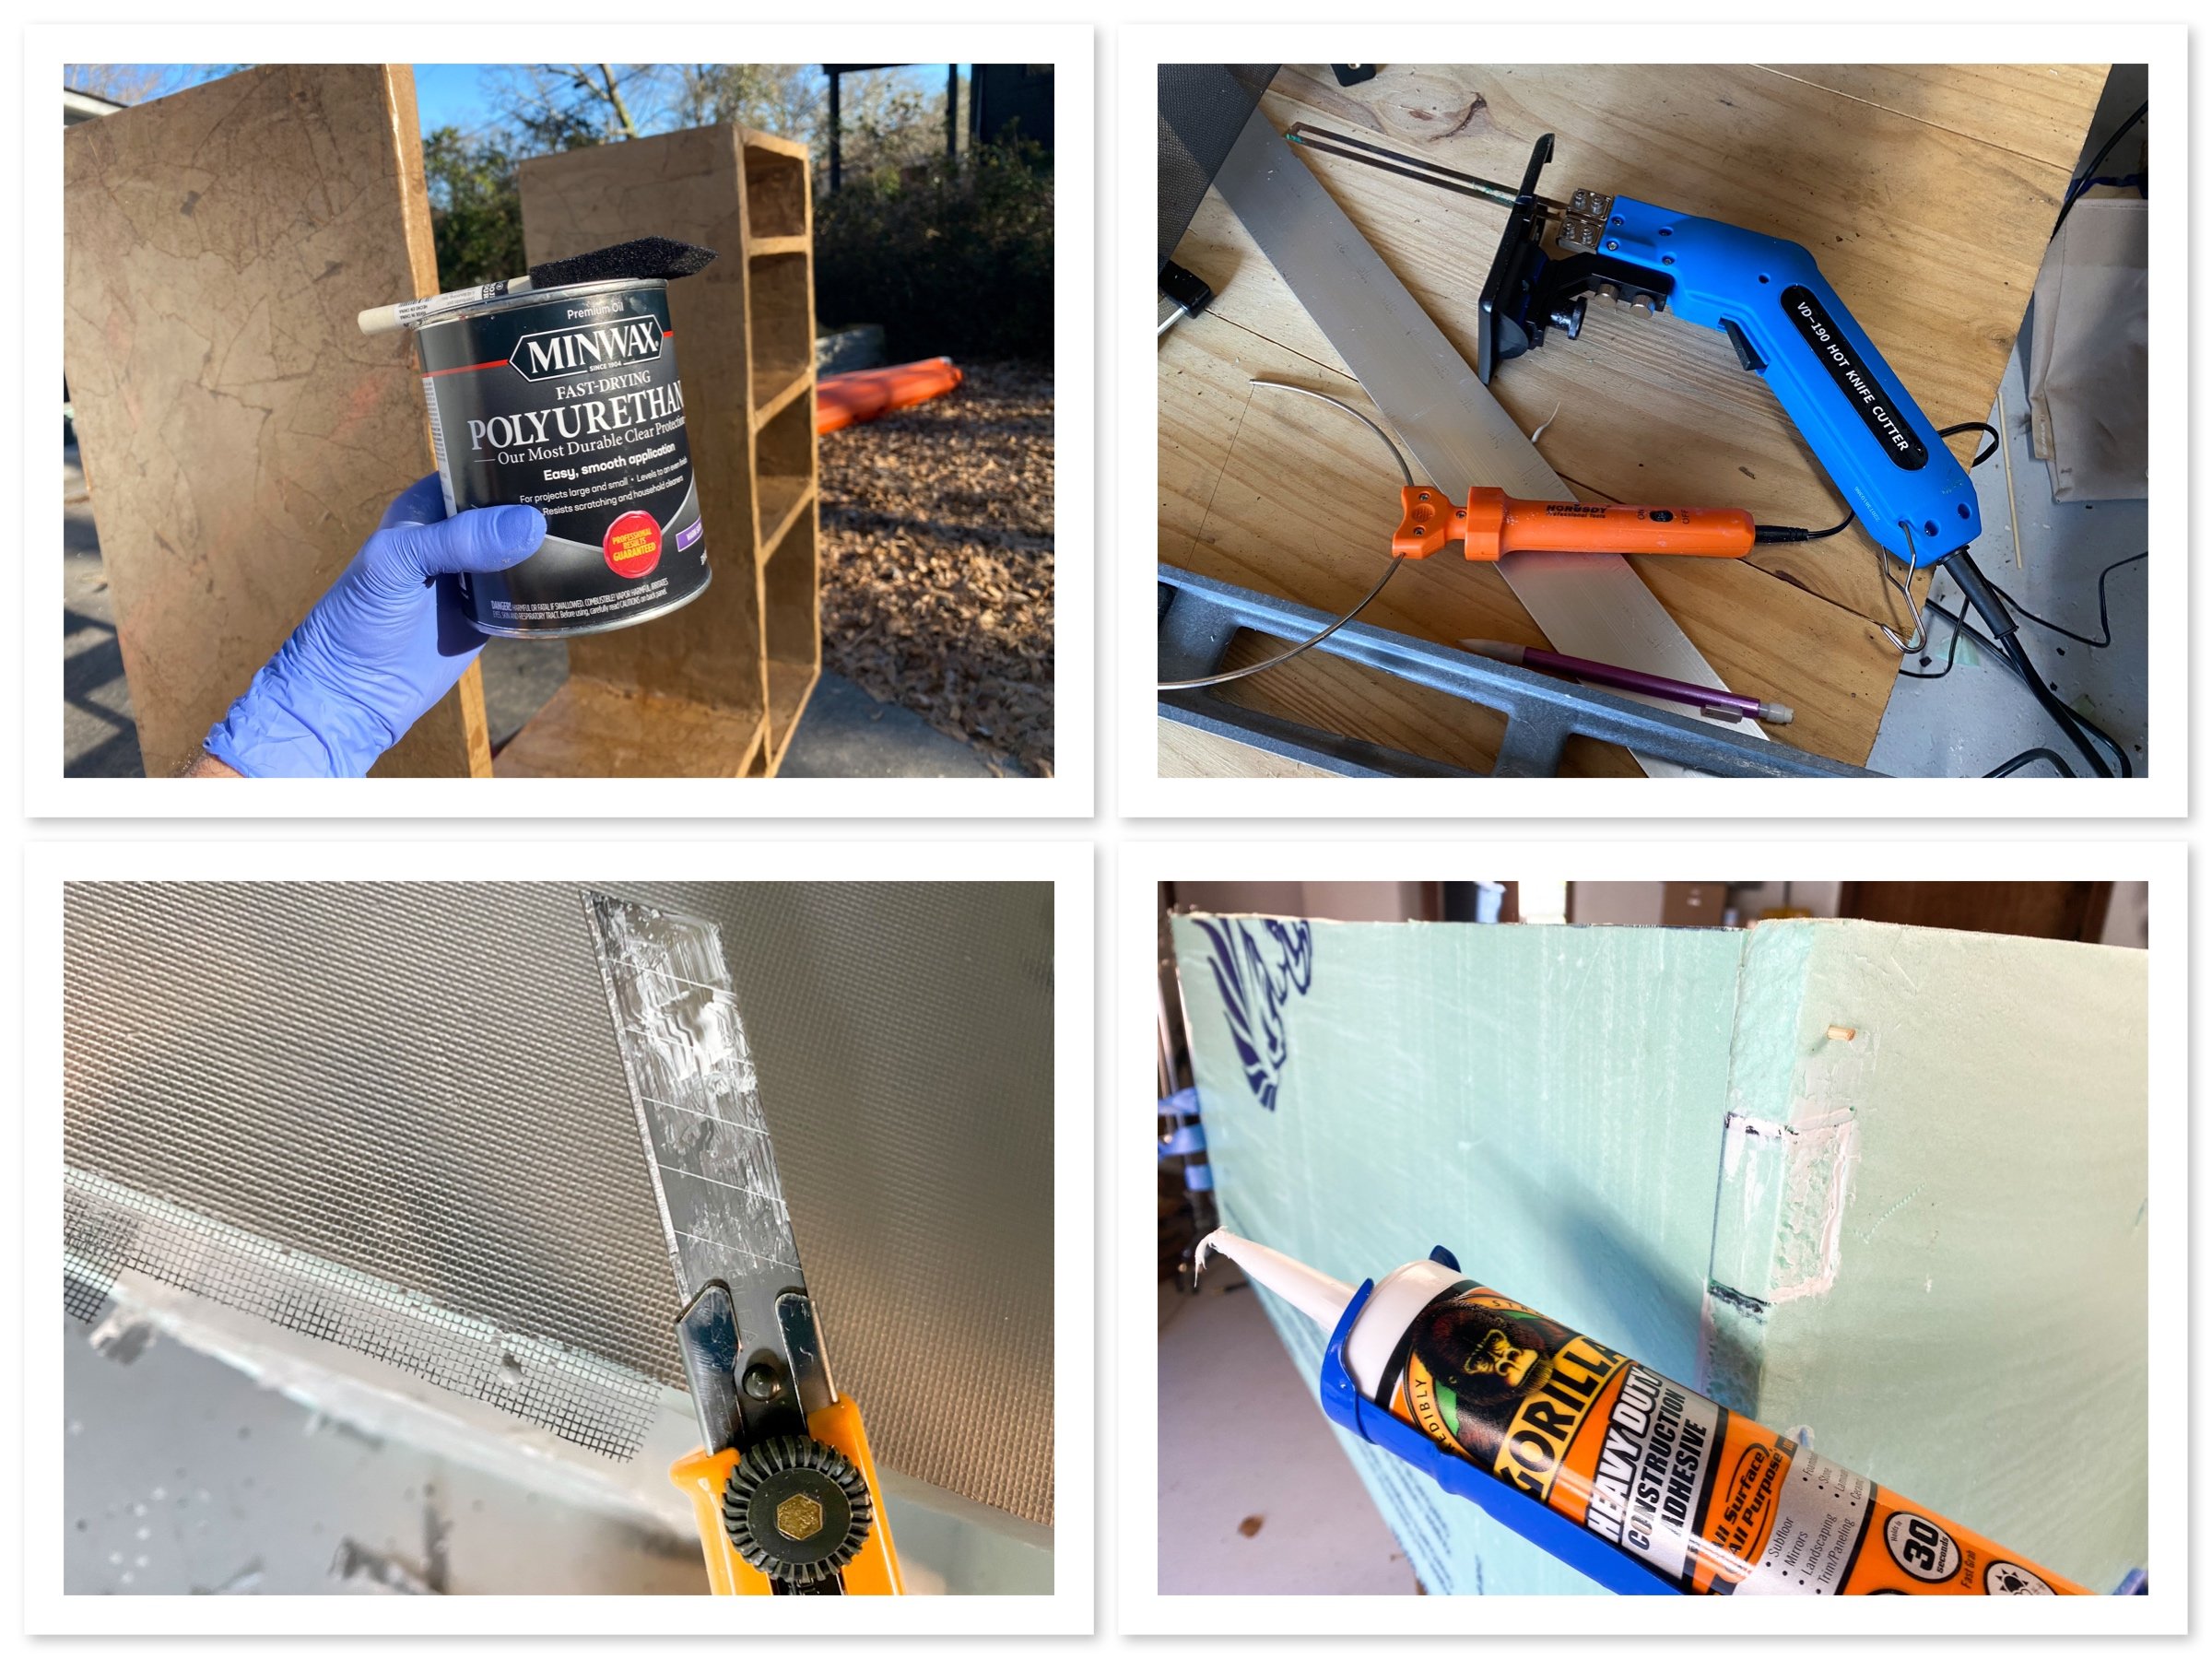
Some of the items I used to build the foamie furniture.
Take a pencil and paper and get inside van. Bring a tape measure. Sketch a plan with measurements.

My original design changed slightly as I went along.
2. Measure and mark up your foam board. I used a metal t-square for straight lines and made box joints on the main structure.
3. Practice making cuts with your tools. I wore an n-95 and turned on a fan in the garage when using the heated cutting tools.
4. Cut the foam board. I used three methods to cut the foam. Each has their pros and cons depending on the type of cut you need. The utility blade is a decent option but not the best in most scenarios. Cutting big sections in the parking lot to fit in your van is best done with well with the utility blade. With the blade, score the foam multiple times and use a flat edge to break it. As the blade dulls, the cuts in the foam will start looking horrible. The break-off blade option is great for this. The wishbone wire cutter is great for the precise cuts, but can’t be used in many scenarios, because of geometry - I think. Clamp a yardstick or t-square to the foam to act as a cutting guide. The hot knife tool is good for long cuts.

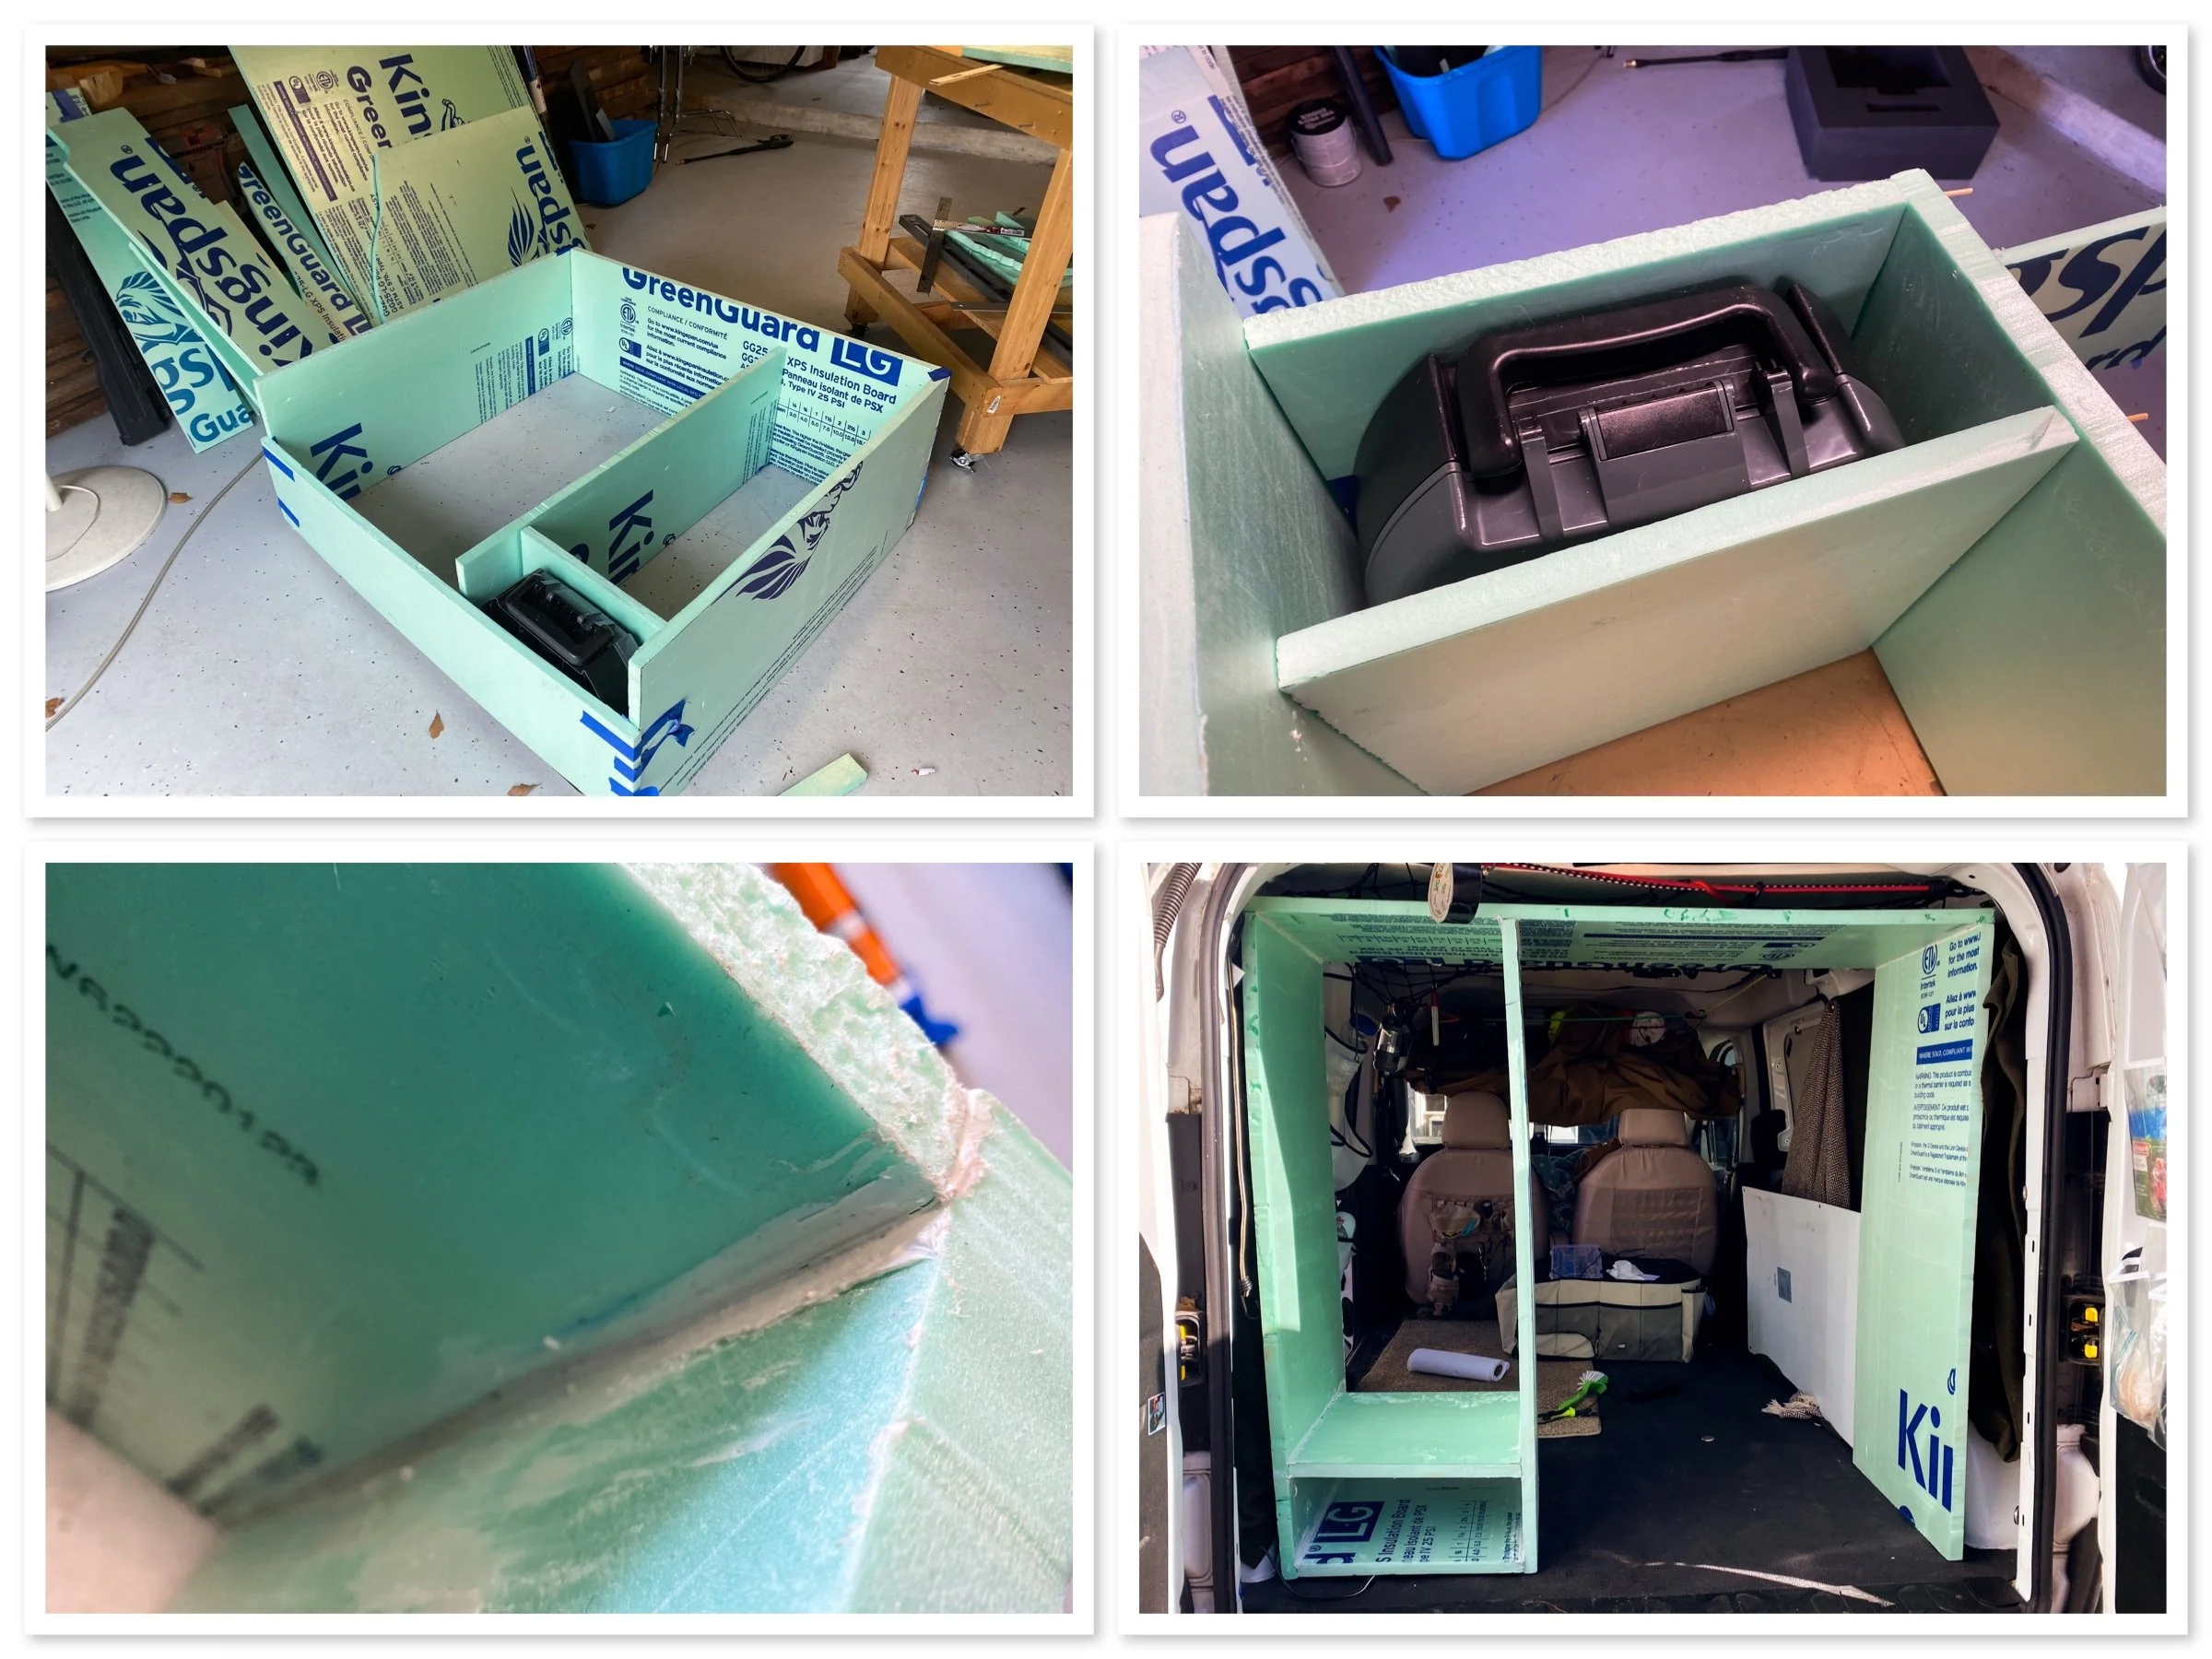
5. With the help of some painters tape, assemble and test out the furniture inside your vehicle. I started with just the basic structure and added a temporary foam brace on the bottom to help keep the shape.
6. Disassemble and return to work area. Apply adhesive on points of contact at joints and reassemble form. Poke a few wooden skewers through the joints where you might put a screw, if screws and foam had a good relationship. I went in about halfway and then cut them with snippers I use to prune branches. After snipping near the end, I used a small block of wood to push the skewers flush with the surface.
7. Let dry.
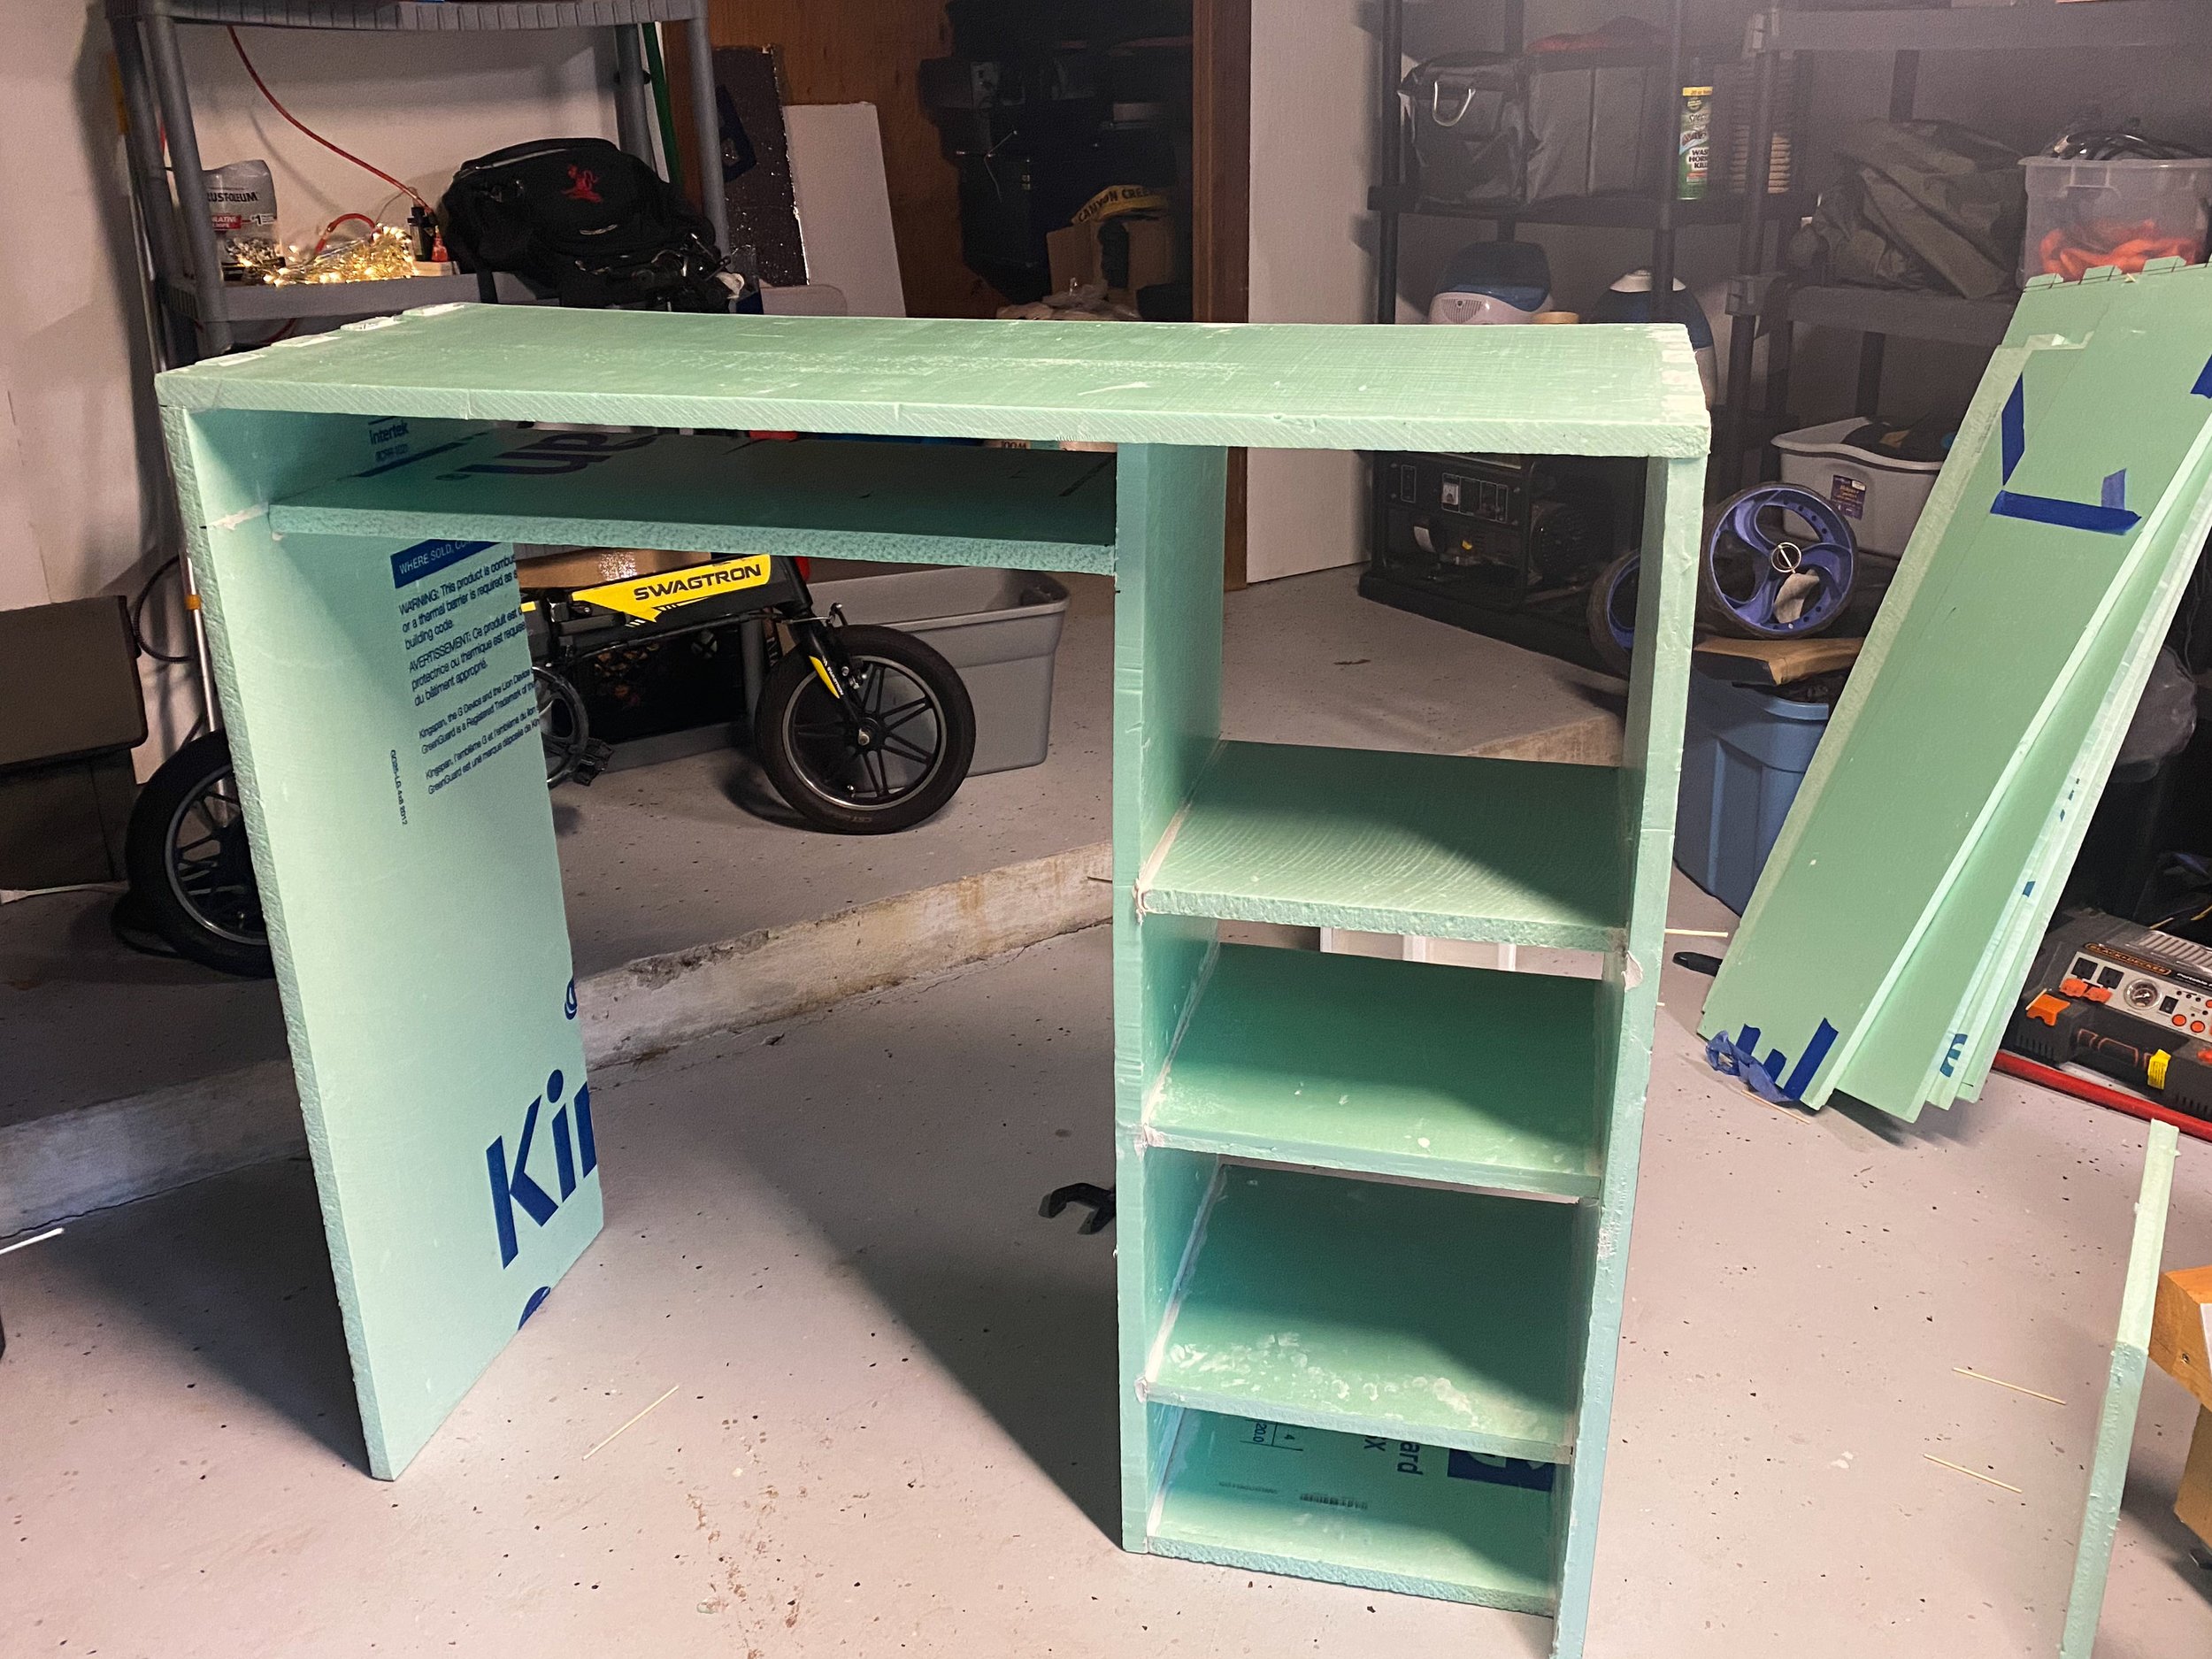
8. Design and add shelving for custom use. First item for me… easy access to folding toilet. No box joints here, but same basic process of cutting, gluing and skewing.
9. Add more shelves. I measured the second and third levels for specific plastic home organizer drawers. They fit in so tight, that they don’t slide and I even had to shave a little plastic off an edge of one to fit in its space. Let dry.
10. Cut thin strips of fiberglass screen for joints and corners.
11. Paint them into place using the bonding primer.
12. Cut big pieces for larger sections of furniture surface. Repeat previous steps. Let dry. I put on 2-3 coats. and used the wooden skewers as temporary mini-clamps to help the bonding process. Important: Lay the screen on the surface so that its natural curve on the roll, curves onto the foam and not away from it!
13. Let dry. This is messy. I used gloves.

14. Make sure bonding primer is completely dry and make sure all the screen is trimmed flush with the foam.
15. Mix two parts water with one Tite Bond Two. I began with a small bucket and graduated to roller tray. This is messy. I used gloves.
16. Tear up kraft paper and crumple into balls. Unfold and dip in glue mixture. Use fingers or another tool to squeegee excess glue. Apply to furniture, starting with corners.
17. Let dry. Depending on the glue saturation and amount of crumpling, post and pre glue dip will give you different dried finished looks. I imagine I can do better with this next time.

18. In some places, like in the bottom right photo above, the glue mixture left a white coloration on the paper. Here, I took a damp rag and wiped until gone.
19. Let dry and sand/cut off any imperfections, etc.
20. Apply (satin) polyurethane using foam or synthetic bristle brush and or paint roller. Make sure your paint roller material isn’t going to “shed” onto your finish.
I put on 2-3 coats of the poly.

21. Wait 24 hours before installing or going on any trips. I hear the fumes are really bad for us. In order to get it in, I had to tip the furniture forward and squeeze it in, and then put it upright. It’s a tight fit!
22. Enjoy your organization.

Sean Rayford is a freelance photojournalist and documentary photographer based in South Carolina covering the southeastern United States. You can see some of his work at www.seanrayford.com